
Sep 20, 2026Technical & Installation
How to Repair Cracks and Surface Defects Before Epoxy Color Sand Flooring
Learn how to repair cracks, holes, damaged concrete, tile joints, and uneven areas before applying epoxy color sand self-leveling flooring.
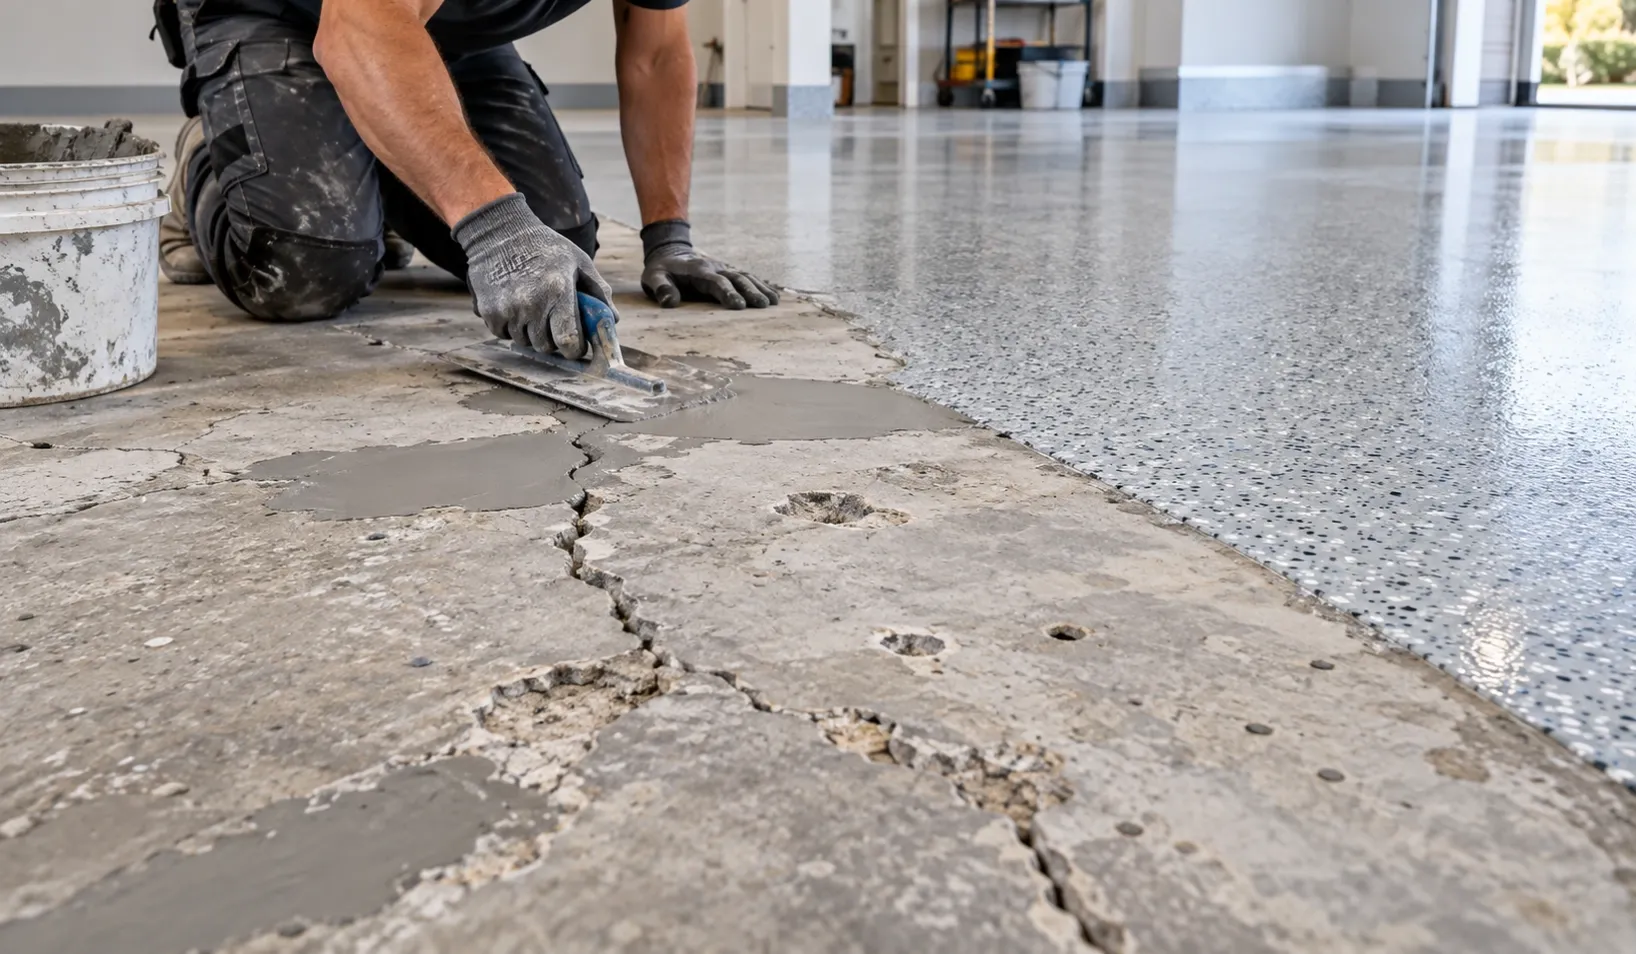
How to Repair Cracks and Surface Defects Before Epoxy Color Sand Flooring
A self-leveling epoxy floor can create a smooth, seamless new surface, but the final result still depends on the condition of the substrate underneath.
Cracks, holes, loose areas, uneven joints, and damaged sections should not simply be covered with epoxy color sand.
They should be repaired before application.
For contractors and property owners, proper substrate repair is one of the most important steps in achieving a durable and consistent epoxy color sand floor.
The basic rule is simple:
Repair first. Level the substrate. Then apply the finish.
Why Cracks Should Be Repaired Before Epoxy Flooring
Epoxy color sand forms a continuous layer across the floor.
However, it is a finishing system, not a substitute for repairing a damaged or unstable substrate.
If cracks or holes are left untreated, they can affect:
- Surface flatness
- Material consumption
- Final appearance
- Adhesion
- Overall flooring quality
This is especially important when renovating older concrete, terrazzo, or tile floors.
A floor may look suitable from a distance while still containing cracks, loose sections, damaged joints, or local depressions that need attention before coating.
Start With a Full Floor Inspection
Before grinding, mixing, or pouring any material, inspect the entire floor.
Look for:
- Visible cracks
- Holes and pits
- Loose concrete
- Hollow or unstable tiles
- Damaged tile joints
- Oil contamination
- Dusting areas
- Uneven sections
- Previous repair materials
Marking these areas before preparation can make the repair process more efficient.
The goal is to identify problems before they are hidden under the new flooring layer.
Concrete Cracks
Concrete cracks should be repaired before applying epoxy color sand.
The surface around the crack should first be cleaned so that loose particles, dust, and contamination do not interfere with the repair.
After repair, the area should be allowed to reach the required condition before the main flooring system is applied.
The finished repair should be:
Solid → Flat → Dry → Clean
A repaired crack that remains higher or lower than the surrounding floor can still show through the final surface or increase material consumption.
Holes, Pits, and Damaged Concrete
Old concrete floors often contain small pits, impact damage, or areas where the surface has broken away.
These defects should be filled before applying the self-leveling layer.
Trying to fill deep holes only with the final epoxy color sand coating is inefficient because more finishing material will be required.
A better approach is:
Repair deep defects first → level the floor → apply epoxy color sand as the final surface
This improves both material efficiency and appearance.
What About Uneven Concrete?
Self-leveling does not mean that the product can correct every type of uneven substrate.
JUKE Epoxy Color Sand is designed to flow and form a continuous finished layer, but large depressions or significant floor irregularities should still be repaired beforehand.
A reasonably flat substrate helps achieve:
- More consistent thickness
- More predictable coverage
- Better decorative appearance
- Lower material consumption
For heavily damaged concrete, substrate repair should be treated as a separate preparation stage.
Repairing Existing Tile Floors
Zero-demolition renovation over existing tiles is one of the main applications of epoxy color sand.
However, the existing tiles must first be checked carefully.
Before application, inspect for:
- Loose tiles
- Hollow areas
- Broken tiles
- Deep joints
- Missing sections
- Surface contamination
Damaged or unstable areas should be repaired before the epoxy color sand layer is installed.
This allows the existing tile floor to function as the substrate rather than removing the entire floor.
Do Tile Joints Need to Be Filled?
Tile joints should be evaluated as part of the overall surface preparation.
Deep or irregular joints may require leveling before the main coating is applied.
The objective is to create a sufficiently flat substrate so the finished epoxy color sand surface can form a consistent layer across both the tiles and the joints.
Very deep joints can increase material consumption if they are filled only with the finishing layer.
For this reason, leveling significant joints beforehand can improve application efficiency.
Terrazzo Floor Repairs
Old terrazzo floors are usually dense and durable, but they can develop cracks, chips, holes, or local damage after years of use.
If the terrazzo remains structurally sound, full demolition may not be necessary.
Damaged areas can be repaired and leveled before the epoxy color sand system is applied over the prepared surface.
The process typically follows the same principle:
Inspect → Repair → Grind → Clean → Apply
This allows the original terrazzo to remain as the substrate while creating a completely new decorative surface above it.
Why Surface Flatness Affects Coverage
JUKE's current export specification is 20 kg per set, covering approximately 10 m² under typical application conditions.
However, this is not an absolute number for every floor.
Coverage can change depending on:
- Floor flatness
- Number of cracks
- Surface defects
- Joint depth
- Repair requirements
- Final application thickness
A smooth, properly repaired floor generally provides more predictable coverage.
A damaged or uneven floor may require significantly more material.
This is why substrate inspection should be completed before calculating the final project quantity.
Grind After Repairs Where Necessary
Once repairs are completed, the floor should be prepared so the repaired areas and original substrate form a suitable surface for coating.
Grinding can help:
- Remove loose surface material
- Remove contamination
- Smooth local repair areas
- Improve overall surface consistency
After grinding, dust must be removed thoroughly.
Residual dust between the substrate and the epoxy system can reduce the quality of the bond.
The Floor Must Be Clean and Dry
Repairing cracks is only part of substrate preparation.
The entire floor must also be free from:
- Dust
- Oil
- Grease
- Loose particles
- Surface contamination
- Excess moisture
For concrete substrates, moisture must be controlled before application.
A clean repair applied to a dirty or damp surrounding floor does not solve the overall substrate problem.
The entire application area should be ready before mixing begins.
When Is Primer Needed?
Primer requirements depend on the substrate.
Suitable dense surfaces such as properly prepared tiles may allow direct application of the epoxy color sand system.
Porous concrete may require additional treatment or an epoxy primer.
This is especially relevant when repaired areas have different absorption characteristics from the original floor.
The important distinction is:
No primer does not mean no preparation.
Even on a dense substrate, cracks and damaged areas still need to be repaired, and the floor must still be cleaned and prepared properly.
Repair Before Mixing the Epoxy Color Sand
All substrate repair work should be completed before Part A and Part B of the main flooring system are mixed.
Once the two components are combined, the material has a limited working time.
The application team should not be repairing cracks while mixed epoxy color sand is sitting in the bucket.
A more efficient workflow is:
Inspect → Repair → Grind → Clean → Prepare tools → Mix → Pour → Spread
This helps contractors use the available working time efficiently and maintain a consistent application.
Application After Substrate Repair
Once the substrate is solid, flat, dry, and clean, JUKE Epoxy Color Sand can be applied.
The material is mixed thoroughly, poured onto the prepared floor, and spread using a notched trowel.
The recommended self-leveling layer is approximately 1.8–2.0 mm.
After spreading, the system forms a continuous decorative surface.
- 4–6 hours: surface dry
- 24 hours: hard dry
- 48 hours: light pedestrian traffic
- 72 hours: vehicle traffic
The repaired substrate and the new flooring layer work together as part of the finished system.
Common Preparation Mistakes
Several mistakes can reduce the quality of a renovation project.
Covering Cracks Without Repair
Self-leveling material should not be expected to replace proper crack repair.
Using the Finish Layer to Fill Deep Holes
This increases material consumption and can make thickness difficult to control.
Ignoring Loose Tiles
A new surface should not be applied over an unstable base.
Leaving Grinding Dust on the Floor
The substrate should be thoroughly cleaned before application.
Mixing Before Preparation Is Finished
Once Part A and Part B are mixed, working time has already started.
Complete the preparation first.
Why Proper Repair Matters for Contractors
Floor renovation customers often focus on the finished color and appearance.
Contractors need to focus on what is underneath.
A high-quality finished floor begins before the decorative material is poured.
Proper crack and defect repair helps create a substrate that is:
Stable. Flat. Dry. Clean. Ready for coating.
This also makes project quantity estimates more accurate and reduces avoidable problems during installation.
A Useful Technical Topic for Flooring Distributors
For distributors and online sellers, substrate repair knowledge is also important.
Customers buying epoxy color sand frequently ask whether they can apply it directly over damaged concrete or old tiles.
The best answer is not simply “yes” or “no.”
The correct approach is to first evaluate the existing floor.
JUKE supports distributors with application guidance, technical materials, marketing content, OEM services, and factory-direct supply.
Low MOQ orders start from 36 sets, allowing partners to test the product in their local market before scaling.
Final Thoughts
Epoxy color sand can transform old concrete, tile, and terrazzo floors without unnecessary demolition, but damaged areas should be repaired before application.
The preparation process is straightforward:
Inspect the floor. Repair cracks and defects. Level damaged areas. Grind where required. Clean thoroughly. Then apply the epoxy color sand system.
Good flooring performance starts with a good substrate.
Need technical support for an epoxy color sand flooring project? Contact JUKE for samples, wholesale pricing, OEM cooperation, and application support.