
Aug 27, 2026Epoxy Color Sand
How to Mix Epoxy Color Sand Self-Leveling Flooring
Learn how to mix Part A and Part B of epoxy color sand flooring correctly, including mixing time, equipment, working time, and common mistakes.
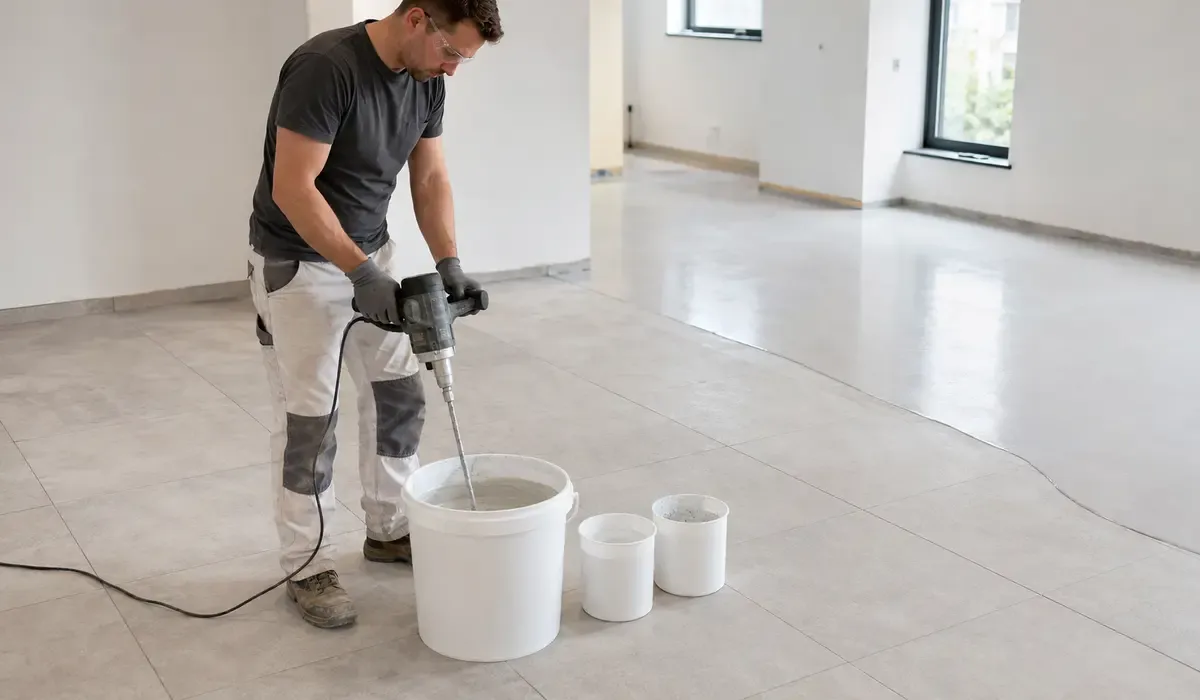
How to Mix Epoxy Color Sand Self-Leveling Flooring
Correct mixing is one of the most important steps when installing epoxy color sand self-leveling flooring. Even when the substrate is properly prepared and high-quality materials are used, incomplete mixing can cause soft areas, inconsistent color, uneven curing, reduced flow, or visible surface defects.
JUKE Epoxy Color Sand Self-Leveling is a two-component system consisting of a premixed epoxy color sand compound, known as Part A, and a specialized curing agent, known as Part B.
The two components are supplied in factory-matched quantities. When a complete set is used, installers do not need to calculate or weigh a new mixing ratio onsite. The entire supplied Part A and Part B should be combined and mixed thoroughly.
The process is simple, but the correct equipment, mixing time, working conditions, and application sequence must still be followed.
Quick Mixing Instructions
The basic JUKE mixing procedure is:
- Confirm that Part A and Part B belong to the same factory-matched set.
- Check that the material temperature and working conditions are suitable.
- Place the mixing container on a clean, stable surface.
- Add the complete supplied Part B to Part A.
- Use a professional electric mixer operating at approximately 500 RPM or above.
- Mix continuously for at least three minutes.
- Move the mixing paddle around the sides and bottom of the container.
- Continue until the color, texture, and fluidity are uniform.
- Apply the mixed material within approximately 50 minutes.
- Do not add water, uncontrolled solvent, extra sand, or pigment.
Once Part A and Part B are combined, the curing reaction begins. The mixed material should therefore be taken to the prepared floor and applied without unnecessary delay.
Understanding Part A and Part B
Part A is not simply liquid epoxy resin. It is a factory-premixed compound containing epoxy resin, special colored sand, silica, calcium-based mineral filler, a reactive viscosity-control component, and other formulation ingredients.
Part B is the curing agent that activates the chemical reaction. When the two components are mixed correctly, the epoxy resin begins to crosslink around the colored sand and mineral particles. The liquid compound gradually becomes a hard, continuous flooring surface.
The specified chemical ratio is Part A to Part B at 8:1 by weight. This ratio remains technically important even though complete JUKE sets are already supplied in the required quantities.
Do Installers Need to Measure the 8:1 Ratio?
Not when using a complete factory-matched JUKE set.
Part A and Part B are supplied in the correct proportions for full-set mixing. The installer adds all the supplied Part B to the corresponding Part A and mixes the complete contents.
This reduces the risk of jobsite weighing errors and makes the system more practical for distributors, contractors, renovation companies, and DIY flooring retailers.
The 8:1 ratio must only be measured onsite when a set is intentionally divided for partial use. In that situation, both components must be weighed accurately with a suitable scale. The ratio should never be estimated by volume, container height, or visual appearance.
Dividing a set also introduces additional risks:
- Inaccurate weighing
- Poor component distribution
- Contamination
- Incorrect storage of the remaining material
- Color differences between separately mixed batches
- Inconsistent curing
For the most reliable result, mixing and applying the complete factory-matched set is recommended.
Equipment Required for Mixing
Use a professional electric mixer with a suitable mixing paddle. Hand stirring is not sufficient for a highly filled epoxy color sand flooring material.
Recommended equipment includes:
- Professional electric mixer
- Clean mixing paddle
- Clean and dry working area
- Timer
- Protective gloves
- Eye protection
- Clean application tools
The mixer should operate at approximately 500 RPM or above, as specified in the JUKE Technical Data Sheet. The paddle must be able to circulate both the liquid resin phase and the heavier mineral ingredients.
A small household drill may not provide stable speed or sufficient mixing force. An unsuitable paddle may also leave unmixed material around the sides or bottom of the container.
All equipment must be completely clean and dry. Water, dust, old cured epoxy, oil, or another coating material can contaminate the mixture and affect the finished floor.
Check the Material Before Mixing
Before opening the packages, confirm:
- The product name and color are correct
- Part A and Part B belong to the same set
- The containers are undamaged
- The material is within its shelf life
- The batch numbers are appropriate for the project
- The substrate is ready for immediate application
- All installers and application tools are in position
Do not begin mixing while floor grinding, cleaning, crack repair, or masking work is still unfinished. Once Part A and Part B are combined, the working-time clock starts.
The unopened JUKE system has a stated shelf life of 24 months when stored correctly in a cool, dry place away from direct sunlight, fire, and heat sources.
Suitable Mixing Conditions
The recommended application temperature is approximately 5°C to 35°C, with relative humidity not exceeding 85%.
Temperature affects the behavior of mixed epoxy:
- Low temperatures can increase viscosity, reduce flow, and slow curing.
- High temperatures can accelerate the reaction and shorten practical working time.
- Condensation can interfere with adhesion and surface appearance.
- Direct sunlight can heat the material and substrate unevenly.
The floor surface must remain dry during application and initial curing. The substrate moisture content should not exceed 8%.
Material stored in a very cold or hot location should be allowed to reach an appropriate working temperature before mixing. Do not attempt to correct viscosity by adding water or an uncontrolled thinner.
Step 1: Prepare the Application Area
Mixing should begin only after the substrate has been approved.
Concrete must be structurally sound, clean, dry, and properly ground. The JUKE Technical Data Sheet specifies a minimum concrete strength of C20. Dust, oil, weak concrete, loose particles, and incompatible old coatings must be removed.
Existing tiles must be firmly bonded, stable, degreased, mechanically abraded, clean, and dry. Loose tiles, hollow areas, damaged grout joints, and cracks must be repaired first.
On a suitable dense tile substrate, JUKE can be applied directly over the existing tiles without demolition and without a separate primer.
Prepare a clear application route before mixing. Installers should work from the uncoated area and must not kneel or stand in the wet material.
Step 2: Combine the Complete Components
Open the factory-matched set and add all the supplied Part B curing agent to Part A.
Allow enough time for the curing-agent container to drain so that the complete intended quantity enters the mixture. Do not leave a significant amount of Part B behind in its package.
Do not add:
- Water
- Construction sand
- Loose colored sand
- Cement
- Unapproved pigment
- Universal thinner
- Material from another product
- An unmatched curing agent
These additions can change the chemical ratio, viscosity, flow, color, density, curing speed, and mechanical performance.
Step 3: Mix for at Least Three Minutes
Start the electric mixer at a controlled speed and mix continuously for at least three minutes.
Move the paddle through the center, sides, corners, and bottom of the container. The objective is to distribute the curing agent through the entire filled compound.
Avoid holding the paddle only in the center. This can create a visibly uniform central area while leaving unmixed material on the container walls or bottom.
The mixer should remain below the material surface as much as practical to reduce unnecessary air incorporation. Do not repeatedly lift the rotating paddle out of the mixture.
The material is ready when it has:
- Uniform color
- Consistent mineral distribution
- Even texture
- No visible streaks
- No separate curing-agent areas
- Consistent fluidity throughout the container
Mixing for less time because the surface appears uniform is not recommended. Color uniformity at the top does not guarantee complete mixing at the bottom.
Step 4: Begin Application Without Delay
The mixed material has an approximate working time of up to 50 minutes under suitable conditions. Practical working time can become shorter when the material or room temperature is high.
Do not leave the complete mixed batch inside the container longer than necessary. A large volume of reacting epoxy can generate heat and cure faster in the bucket than material already spread across the floor.
Move the material to the prepared application area and distribute it in a controlled sequence. Avoid pouring the entire quantity into one deep pile if it cannot be spread immediately.
Adjacent placements should remain close enough to join while wet. Long interruptions can create visible transition marks or differences in leveling.
Step 5: Spread at the Correct Thickness
Use a suitable notched trowel or long-handled spreading tool to distribute the material evenly.
The current recommended floor application thickness is 1.0–2.0 mm, with an allowable deviation of ±0.2 mm. A standard 24 kg set covers approximately 12 m², depending on substrate condition, application thickness, surface profile, and installation loss.
Self-leveling does not mean the material can be poured and left without spreading. The installer must first distribute a controlled amount across the floor. The wet compound can then settle and reduce minor application marks.
A defoaming spiked roller is not required for the standard JUKE system. The finished surface also does not normally require an additional topcoat.
Working With Multiple Sets
Larger floors require careful batch planning.
Before the first set is mixed, determine:
- The approximate area covered by each set
- The application direction
- The location of natural stopping points
- Who will mix each batch
- Who will transport and spread the material
- How the wet edges will be maintained
Use the same mixing equipment, mixing duration, application method, and thickness for every batch. Whenever possible, use material from the same production batch within one continuous visible area.
The next set should be prepared in time to connect with the preceding section while the edge is still workable. However, do not mix too many sets in advance, because material may begin curing before it reaches the floor.
Common Mixing Mistakes
Incomplete Mixing
Material left around the sides or bottom may contain an incorrect concentration of Part A or Part B. This can cause sticky areas, soft spots, color differences, or uneven gloss.
Estimating a Partial Batch
The 8:1 ratio is based on weight, not visual volume. Estimating a divided batch can prevent complete curing.
Using Dirty or Wet Tools
Moisture and contamination can affect the reaction and create surface defects.
Adding Unapproved Materials
Water, solvent, pigment, or extra sand can reduce performance and change the designed coverage and flow.
Mixing Too Early
If the substrate and installers are not ready, valuable working time is lost while the material remains in the container.
Waiting Too Long Before Spreading
The material becomes more viscous as the reaction progresses. Late application can reduce flow and make tool marks more visible.
Mixing at Excessive Speed
Uncontrolled high-speed mixing may introduce unnecessary air and increase splashing. Use stable professional equipment and controlled movement.
Ignoring Temperature
A method that works comfortably at a moderate temperature may become much faster in a hot room or much slower in a cold room.
Curing After Application
After application, protect the area from water, dust, traffic, and other construction work.
Under suitable conditions, the JUKE Technical Data Sheet lists:
- Surface dry: approximately 4–6 hours
- Hard dry: approximately 24 hours
- Light pedestrian traffic: after approximately 48 hours
- Vehicle traffic: after approximately 72 hours
Actual curing depends on temperature, humidity, ventilation, application thickness, substrate condition, and mixing accuracy.
A surface that feels dry should not automatically be treated as fully cured. Follow the required curing period before washing, covering, loading, or returning the floor to service.
Frequently Asked Questions
Can Part A and Part B be mixed by hand?
No. A professional electric mixer is recommended to distribute the curing agent through the high-filled compound.
Must the installer weigh a complete set?
No. Complete JUKE sets are factory matched. Use all the supplied Part A and Part B together.
How long should the components be mixed?
Mix continuously for at least three minutes and continue until the color, texture, and fluidity are completely uniform.
How quickly must the mixed material be used?
The material should be applied within approximately 50 minutes under suitable conditions. High temperatures may shorten the practical working time.
Can water be added to improve flow?
No. Do not add water or an uncontrolled thinner. Changes to the formulation may affect curing, strength, appearance, and adhesion.
Does self-leveling remove the need for spreading?
No. The material must first be distributed evenly with a notched trowel or suitable long-handled tool.
Is a spiked roller required?
No. A defoaming spiked roller is not required for the standard JUKE system.
Correct Mixing Creates a Consistent Floor
The essential mixing procedure is straightforward: combine the complete factory-matched Part A and Part B, mix mechanically for at least three minutes, incorporate material from the sides and bottom, and begin application without delay.
Consistency is more important than speed. Every set should be mixed with the same equipment, duration, temperature control, and application sequence.
When correctly mixed and applied over a suitable prepared substrate, JUKE Epoxy Color Sand Self-Leveling forms a seamless decorative floor with zero demolition, direct-to-tile installation, no separate primer, and natural self-leveling performance.
Distributors, decorative concrete suppliers, tile suppliers, building material wholesalers, and private-label sellers can request the TDS, product samples, factory-direct pricing, OEM packaging, application videos, and marketing support.